My HP Pavilion DM1-4010EZ Installing Linux Mint 12 Experience

When we last left off working on our lovely new HP DM1-4010EX Sub Notebook, I had just finished installing and configuring Microsoft Windows 7 Home Premium.
Now with the windows operating system out of the way it is time to move into installing a real computer operating system on it, and for the sake of variety the choice this time will be Linux Mint 12 and Cinnamon 1.1.3.
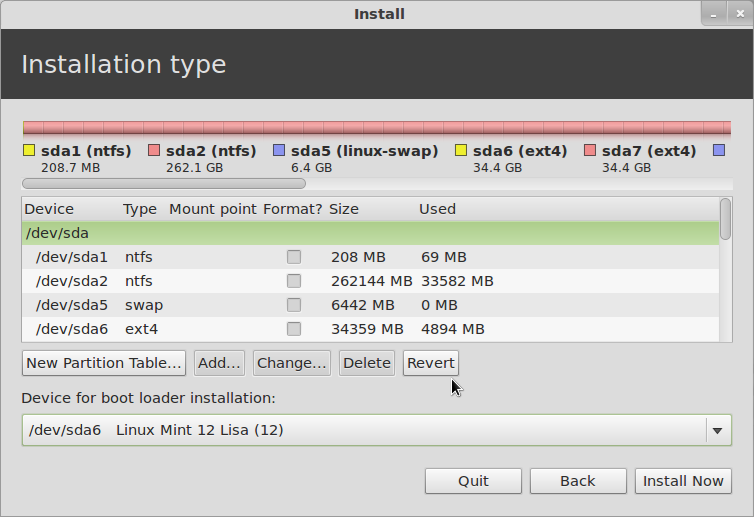
The very first thing to do is prepare the internal hard disk drive. As I said in the previous post, all four of the Primary Partitions are used in the default configuration of this system.
The disk layout looks like this in GParted:
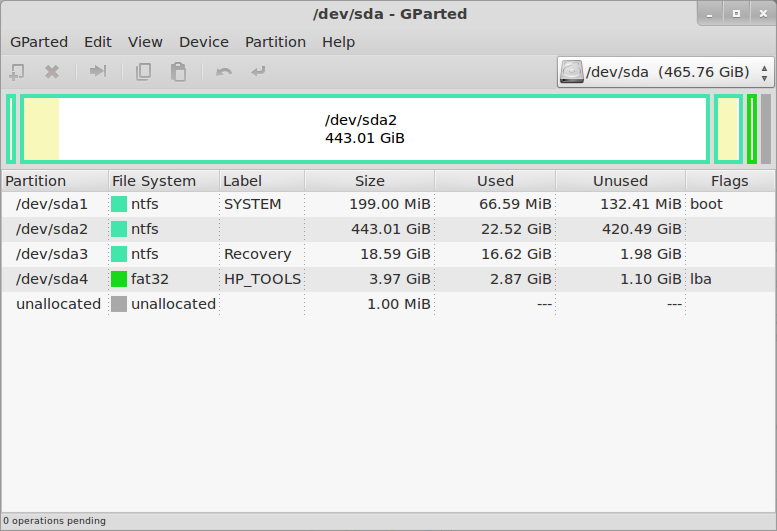
I will say this one more time… Make Sure You Have Created A Set Of Recovery DVDs. Once you delete the Recovery partition, you will never have another chance to create them.
The other consequence of deleting the Recovery partition is that you can not do the F11-Recovery procedure, if you ever really need to restore Windows you will have to do it from the DVDs.
The simplest and most direct thing to do is to delete it in GParted, since we already have that running. But in this case it is probably better to go back to Windows and delete it using the HP Recovery Manager, so that it knows that the partition is gone. Either way you do it, once the partition has been deleted the disk will look like this in GParted:
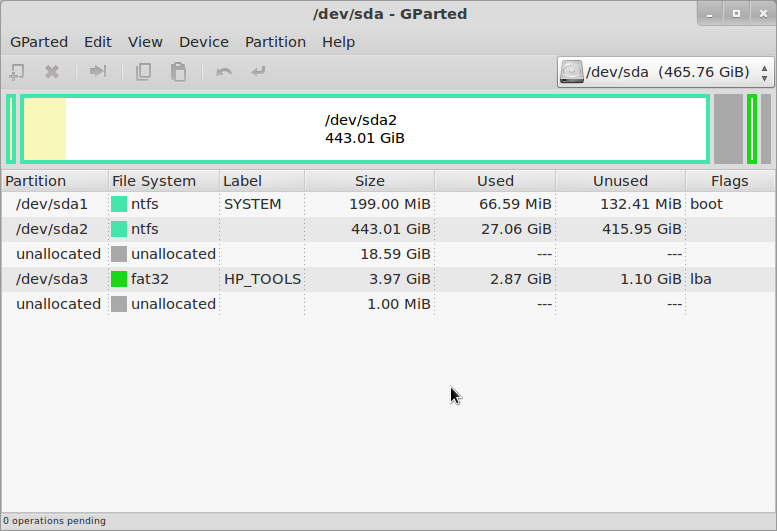
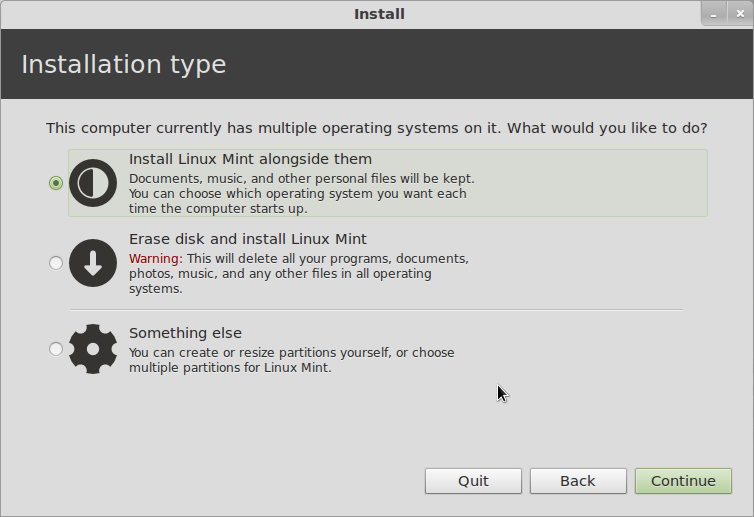
If you want more space you can just shrink the Windows partition (/dev/sda2). The next step is to create an Extended partition in the free space, and then either create two more logical partitions within that for the Linux root and swap, or just leave the extended partition empty and let the Linux installer create the partitions it wants.
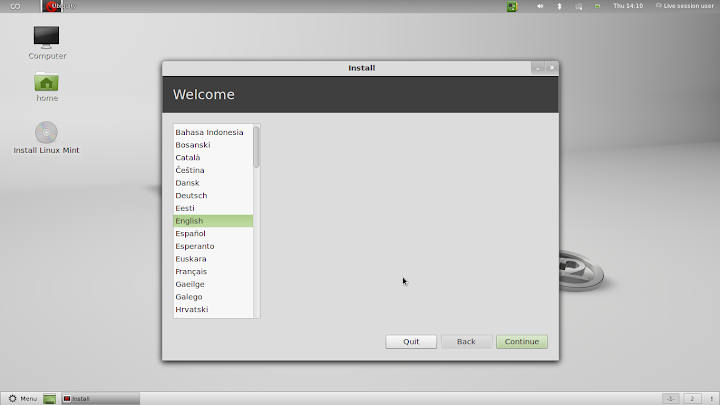
Download the ISO image from the Linux Mint Downloads page. I just about always use the 64-bit images now, but of course you can still use 32-bit if you want or need to, or if you are just extremely conservative. The ISO image can be converted to a bootable USB stick using the “Startup Disk Creator” utility on any running Mint 9/10/11 system, or of course it can be burned to a DVD-R (sorry, too big for CD-R).
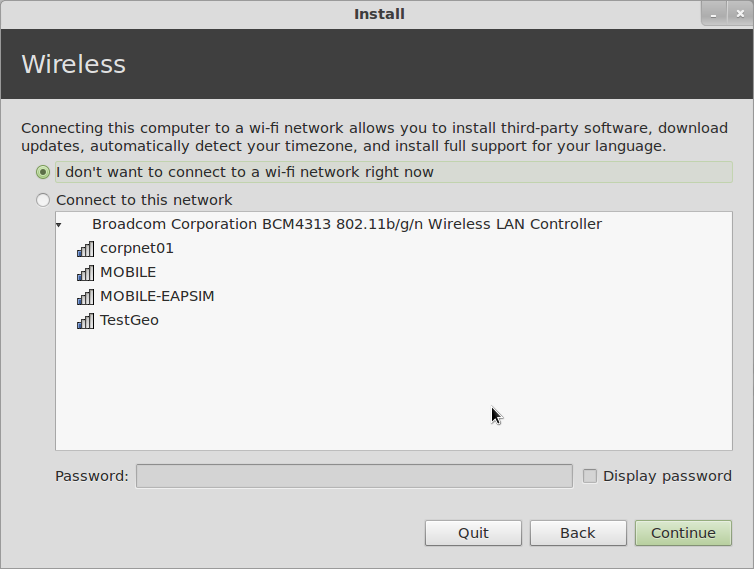
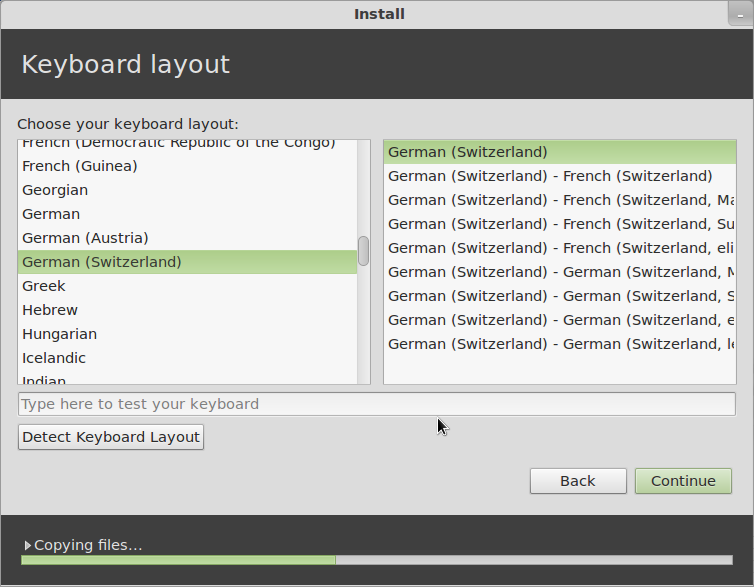
Insert the USB stick or connect the USB DVD drive, turn on power and press F9 (the boot device selection key for HP systems). When booting from USB stick, it still stops with an error about the vesamenu not being a COM32R image, and then says “boot: “. Sigh.
I wish this didn’t happen, because it confuses an awful lot of inexperienced users. All you have to do is type “live” and press return, but figuring that out can be daunting. I haven’t tried burning a DVD for Mint in a long time, does this still happen when booting that way as well?

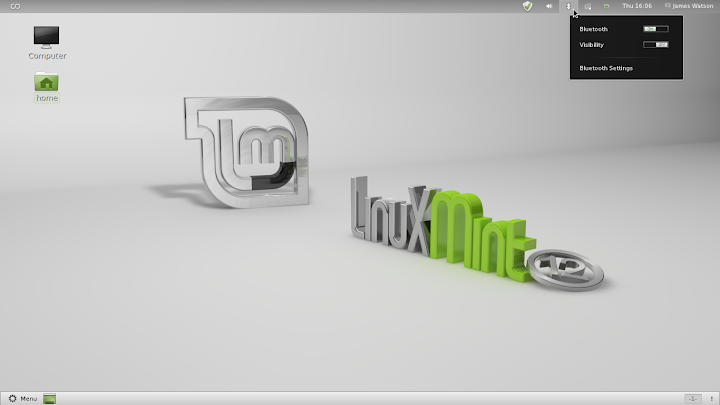
This is a bit of an inconvenience for me, because I sometimes use a bluetooth mouse or printer, but it is certainly not a big deal. By the way, in addition to showing the default Mint 12 desktop, I’ll include the simplest way to tell if Bluetooth is working. It seems to me that the Bluetooth icon used to not show up in the panel if Bluetooth wasn’t actually available, but now it looks like it is always there – perhaps this is something new with Gnome 3, I haven’t really cared enough to look into it yet.
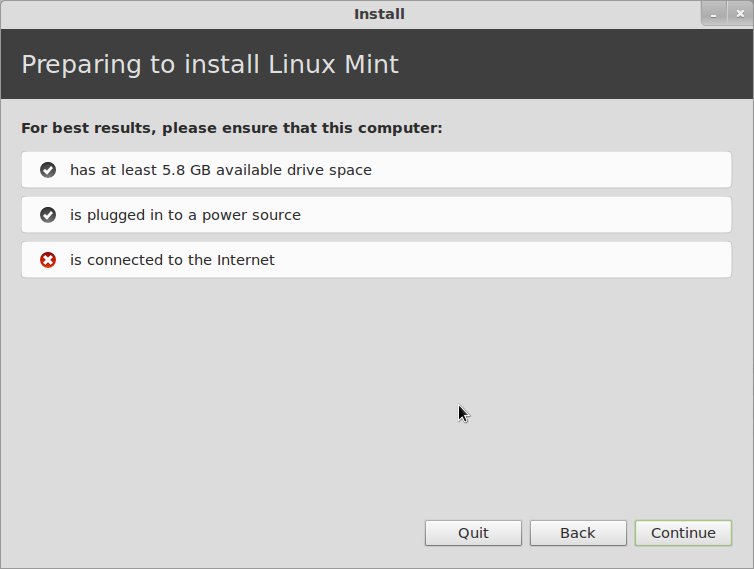
But if Bluetooth is actually available and working, when you click on the Bluetooth icon you will get options for “Send files to device…” and “Set up new device…”. If you don’t see those, as in the screen below, then Bluetooth is not available, so don’t waste a lot of time tearing your hair out trying to figure out how to add a Bluetooth device, as I did, when Bluetooth isn’t working at all.
I expect this problem to be taken care of by an update in the near future.
What we have ended up with here is a very nice sub-notebook, it looks good, feels good, works well, and when we turn it on we can choose whether to run Linux Mint 12 (loud cheers in the background) or Windows 7 Home Premium (boos and hisses, and I am ducking lemons and rotten tomatoes being thrown from the cheap seats).
No comments yet.
Leave a comment
You must be logged in to post a comment.
Search
Categories
- 32
- 3G
- 4G
- 610M
- 64
- 7
- 7600
- 7601
- abusive husband
- abusive wife
- Acer
- Activate
- Activated
- Activates
- Activating
- Activation
- Activations
- Activator
- Active
- Advanced SystemCare
- advent printer ink
- AlienWare
- All In One PC
- AMD
- AMD 7960
- AMD Radeon
- AMD Radeon HD
- AMD Radeon HD 7960
- Android
- Android Tablet
- Android Tablet PC
- Android Tablets
- Anti Malware
- Anti Spyware
- Anti Virus Software
- AntiSpyWare
- AntiVirus Software
- Apple
- Asus
- ASUS CM1740-US-2AG
- Asus U44SG
- asus x44h laptop
- asus x44h review
- asus x44h series
- asus x44h vx107d
- asus x44h-bd2gs
- asus x44hy
- asus x44hy vx067d
- asus x44hy-vx041
- Avira
- Avira AntiVirus
- bangkok drive
- battered woman syndrome
- Batteries
- Battery
- Best Android Tablet
- Best Free AntiVirus
- Best Laptop
- Best Laptops
- Bios
- Bit
- BitDefender
- BlackBerry
- brother printer ink
- Build
- cab drivin
- cab onlin
- cabby ca
- canon printer ink
- canon printer ink cartridges
- Card
- Cheap Laptops
- cheapest printer ink
- Cloud
- Cloud Computing
- Company
- Computer
- Computer Desk
- Computer Desks
- Computer Engineering
- Computer Hardware
- Computer Monitor
- Computer Mouse
- Computer Operating System
- Computer Parts
- Computer Repair
- Computer Repair Winnipeg
- Computer Science
- Computer Service
- Computer Software
- Computer Store
- Computer Virus
- Computers
- Core
- Core i3
- Core i3-2310M
- Core i5
- Core i7
- Core i7-2640
- CPU
- CPUs
- Crack
- Cracker
- Cracking
- Data
- Data Recovery
- DDR3
- dell printer ink
- Desktop
- Desktop Computers
- Desktop PC
- Development
- Device
- domestic violence statistics
- domestic violence stories
- Download
- Download AntiVirus
- Drive
- driver in bangkok
- Droid
- DVD-R
- Education
- EEE
- EEE PC
- emotionally abusive relationship
- emotionally abusive relationships
- ESet
- External
- External Hard Drive
- Firewall
- Fix
- For
- Free
- Full
- Galaxy Tab 11.6 Release Date
- Galaxy Tablet
- Game
- Gamer PC
- Games
- Gaming Computers
- Generator
- Gingerbread
- Google Cloud
- GPS
- GPU
- Hack
- Hacker
- Hacking
- Handset
- Hard Drive
- Hardware
- HDMI
- History Of Computer
- How To Set Up Linux On Your Computer
- HP
- HTC
- IBM
- Identity
- Image
- Information
- Intel
- Intel HD 3000
- Internal
- Internet
- iOS
- iPhone
- iPhone 5
- iPod
- ISO
- IT
- IT Services
- IT Support
- iTunes
- Ivy Bridge
- Key
- Laptop
- Laptop Batteries
- Laptop Computers
- Laptop Deals
- Laptops
- Lenovo
- lenovo edge s430
- lenovo s430
- lenovo s430 review
- Lenovo Tablet
- Lenovo ThinkPad Edge S430
- lenovo thinkpad edge s430 review
- lenovo thinkpad s430
- Linux
- Linux And Windows
- Linux Grub
- Linux Mint
- Linux Operating System
- Linux OS
- Logitech
- Logitech M187
- LTE
- Macbook
- Macbook Pro
- Mainboard
- Malware
- Market
- Media
- Media Center
- met police burea
- met police h
- met police record
- met police special
- met police station
- Microchip
- MicroSD
- Microsoft
- Microsoft Security Essentials
- Microsoft Virtual PC
- Microsoft Windows
- Mini
- Mini Laptop
- Mini Laptops
- Mini Mouse
- Mini Notebook
- Mini PC
- Mobile
- Monitor
- Motherboards
- Motorola
- Mouse
- MSI
- Music
- My Computer
- Net Book
- Netbook
- Netbooks
- Network
- New Laptops
- Nod32
- Nokia
- Notebook
- Notebooks
- NVidia
- Nvidia 610M
- OA
- Online
- online ca
- OS
- OSX
- Panda
- Parts
- Patent
- Patents
- PC
- PC Companion
- PC Doctor
- PC Gamer
- PC Hardware
- PC Home
- PC Magazine
- PC Suite
- PC Tablet
- PC Tools
- PC World
- PCs
- PCTools
- Phone
- Photos
- Platform
- Playback
- Pocket PC
- Portfolio
- printer ink
- printer ink uk
- printers ink
- Privacy
- Pro
- Problem
- Processor
- Product
- Program
- Project
- Radeon HD 7960
- Raspberry Pi
- Raspberry Pi Computers
- Razr
- Refurbished Laptops
- Remote
- Remote Access
- Remote Desktop
- Repair
- Retina Display
- Review
- Robotic
- Safety
- Samsung
- Samsung Galaxy
- Samsung Galaxy S2
- Samsung Galaxy Tab 11.6 Release Date
- Samsung Galaxy Tablet
- Samsung Illusion
- Samsung Laptop
- Samsung Laptops
- Samsung Netbook
- Samsung Tablet
- Sceen
- School
- Science
- Screen
- Security
- Security Essentials
- Serial
- Service
- Shop
- SmartPhone
- SNPC
- Social
- software
- Sony
- Sony Vaio
- South African Stocks
- SP1
- Speed
- Speed Test
- Spyware
- SSD
- Starter
- Stock
- Storage
- Store
- Support
- System
- Table
- Tablet
- Tablet Android
- Tablet PC
- Technology
- Themes
- thinkpad edge s430
- thinkpad edge s430 review
- thinkpad s430
- Thunderbolt
- Touch Screen
- Touch Screen Laptop
- Trouble
- Ultimate
- Ultrabook
- Uncategorized
- Upgrade
- USB
- USB 2.0
- USB 3.0
- verbal abuse
- Version
- Video
- Video Card
- Virtual
- Virtual Machine
- Virtual PC
- Virus
- Virus Protection
- Virus Removal
- What Is Cloud Computing
- What You Should Expect From Windows 8
- Win 7
- Win7
- Windows
- Windows 7
- Windows 7 Home Premium
- Windows 7 Starter
- Windows 7 Tablet
- Windows 7 Ultimate
- Windows 8
- Windows And Linux
- Windows Live
- Windows Media Center
- Windows Mobile 7
- Windows PC
- Windows Tablet
- Windows Update
- Windows Virtual PC
- Winnipeg Computer
- Winnipeg Computer Blog
- Winnipeg Computer Master
- Winnipeg Computer Repair
- Winnipeg Computer Repair Master
- Winnipeg Computer Repairs
- Winnipeg Computers
- Winnipeg Laptop
- Winnipeg Laptops
- Winnipeg PC
- Wireless Mouse
- WordPress
- x64
- x86
- YouTube
- Z77-GD65
- Z77A-GD80
Archive
Links
- Winnipeg Computer Master
- Winnipeg Computer Repair
- Winnipeg Computer Repair AngleFire
- Winnipeg Computer Repair Area
- Winnipeg Computer Repair BlinkWeb
- Winnipeg Computer Repair BlogGum
- Winnipeg Computer Repair Bloglines CoZa
- Winnipeg Computer Repair BlogText
- Winnipeg Computer Repair JoeUser
- Winnipeg Computer Repair MemeBot
- Winnipeg Computer Repair SexusBlog
- Winnipeg Computer Repair Streamline
- Winnipeg Computer Repair WebLog Plaza